TN 015: Using Single Sign On (SSO) with Dream Report
Introduction
SSO (Single Sign-On) is a method used for accessing connected systems without using multiple usernames and passwords for each system. In Dream Report, SSO can be used to connect to the Dream Report Web Portal (DRWeb) from third-party web applications, with only one log-on.
How it Works
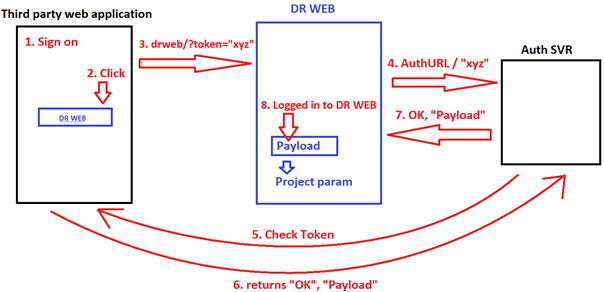
- The user signs in to the third-party application with their username and password.
- The user entering the Dream Report Web Portal from a link in the application.
- The third-party application opens the Dream Report Web portal with the URL http://hostname/drweb/?token=xyz (for example)
- DR Web Portal takes the token and inserts it (instead of the token placeholder) into previously configured authorization URL (refer to step 5 on the last page of this tech note), and performs a GET request with the composed URL. For example - http://my-auth-server/{token}
- The Authorization Server checks for authorization from the third-party application
- In the case of a match – the third-party application returns “Ok”, and a “Payload” (JSON parameter that contains user data for the project to use when running)
- The Authorization Server sends the response and the “Payload” to the DR Web.
- In the case the response is “200” (HTTP status code for “Ok”), the DR Web Portal will perform a login and open the portal page. Additionally, the DR Web Portal will take the “payload” from the response and save it. For each report generation the configured parameter name will be filled with the saved payload.
* In the case that the response is not “Ok”, the DR Web Portal will not perform the login.
How to Configure Single Sign On in Dream Report
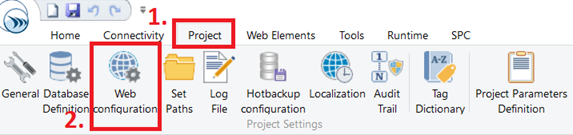
- Enter Dream Report Studio and open your project
- Select the “Project” tab, and click “Web configuration” as shown:
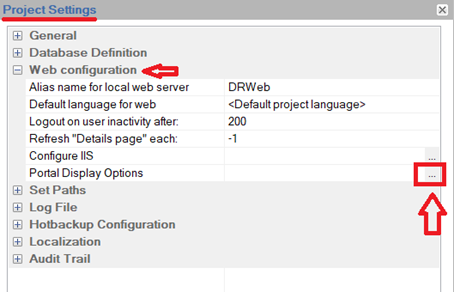
3. When the “Project Settings” window opens, click the “[…]” near the “Portal Display Options” setting:
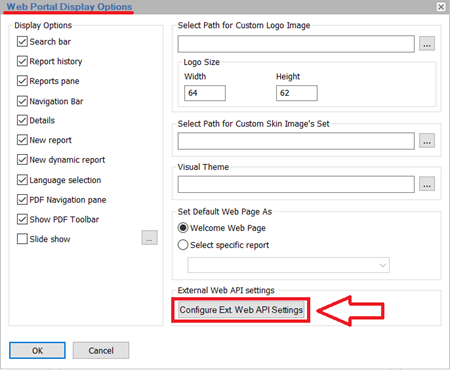
4. When the “Web Portal Display Options” configuration window opens, click the “Configure Ext. Web API Settings” button:
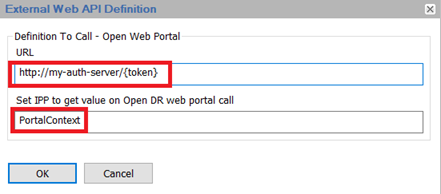
5. In the “External Web API Definition” window you will insert the special URL for the authorization request that is provided by the third-party for token validation, for example - http://my-auth-server/{token}, and session parameter name (IPP, or Internal Project Parameter) to be used in generation requests:
Related articles